
Are you feeling the urge to refresh your living space without breaking the bank? This topic has me excited because home decor is not just about aesthetics; it’s about creating a space where you feel comfortable and inspired. If you’re someone who loves DIY projects or simply wants to add a personal touch to your home, then you’re in the right place. You don’t have to be a design expert or spend a fortune to elevate your surroundings.
I pulled together 25 budget-friendly DIY home decor ideas that are not only easy to tackle but also guaranteed to breathe new life into your space. Whether you’re a seasoned crafter or a beginner looking for simple projects, these ideas will help you express your unique style. Imagine transforming your walls with painted canvases, or making personalized throw pillows that reflect your personality. The best part? You won’t believe how affordable and fun these projects can be!
From clever upcycling techniques to creative wall hangings, you’ll find plenty of inspiration that’s both practical and stylish. Dive into your next weekend project and watch your home come alive with your personal flair. Let’s explore these amazing DIY home decor ideas that will turn your house into a home!
Key Takeaways
– Discover creative DIY projects that enhance any room, from artwork to furniture upgrades.
– Learn how to repurpose everyday items into stunning decor, saving money while minimizing waste.
– Find step-by-step guidance to tackle each project, ensuring that even beginners can join in on the fun.
– Get inspired by unique ideas that reflect your personal style, helping you create a cozy and inviting space.
– Enjoy a sense of accomplishment as you transform your home and express your creativity through hands-on work.
1. Painted Canvas Art
Embrace your creativity and transform blank walls into vibrant canvases with painted canvas art! This DIY project allows you to express your personality while enhancing your home’s aesthetic. Using acrylic paints on a blank canvas, you can create anything from abstract shapes to colorful stencils, bringing a unique charm to your space. Arrange your artwork in clusters or as a single statement piece on a feature wall for a stunning visual impact. It’s an affordable way to personalize your surroundings and make them truly yours!
To make the most of your painted canvas art, consider these practical tips: Look for inspiration online or in art books, and gather supplies at your local craft store. If you’re on a budget, use leftover paint or old canvases to create your designs. This artistic endeavor not only beautifies your home but also offers a rewarding outlet for self-expression.
Consider these elements to maximize this project:
– Use painter’s tape for sharp, clean lines.
– Experiment with brush techniques like sponging or swirling.
– Mix colors for a one-of-a-kind masterpiece.
Incorporating textures and layers can elevate the overall aesthetic, making your walls not just a backdrop but a reflection of your creative spirit.
2. DIY Macramé Wall Hanging
Add a touch of boho elegance to your walls with a DIY macramé wall hanging! This trendy knotting technique allows you to create beautiful designs that infuse your space with texture and warmth. With just some cotton cord and a wooden dowel, you can craft a stunning piece that showcases your artistic side while serving as a unique decor element. The soothing process of knotting is therapeutic, making it a delightful project for anyone looking to enhance their home.
For a successful macramé wall hanging, start by watching tutorials to learn various knotting techniques. Choose a cord color that complements your room’s palette, and don’t hesitate to mix and match lengths for a dynamic layered effect. This project is both affordable and satisfying, tapping into the growing trend of handmade decor.
Consider these tips to get started:
– Watch tutorials for different knotting techniques.
– Choose a color that complements your space.
– Experiment with lengths to create a layered look.
This handmade decor piece adds not only visual interest but also a cozy, inviting vibe to any room.
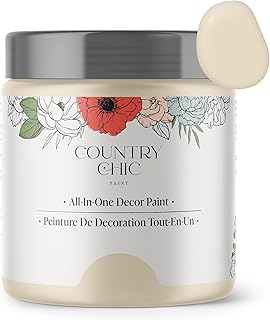
3. Upcycled Furniture
Revitalize your living space by transforming old furniture into stunning statement pieces! Upcycling is a creative and budget-friendly way to breathe new life into tired items like dressers or chairs. With a bit of cleaning, sanding, and a splash of paint or new upholstery, you can create unique furniture that reflects your style. This project not only saves money but also promotes sustainability by reducing waste in the home.
To successfully upcycle your furniture, start by selecting colors that enhance your room’s ambiance. Consider using fabric scraps for reupholstering chairs or adding new knobs for a fresh look. This practice aligns with the current design trend of mixing vintage and modern elements, making your home feel both stylish and personal.
Here are some actionable steps to take:
– Choose colors that enhance your room’s vibe.
– Use fabric scraps for reupholstering chairs.
– Consider adding new knobs or handles for a fresh look.
This DIY project not only revitalizes your furniture but also adds character and charm to your living space.

4. Personalized Throw Pillows
Elevate your living space with personalized throw pillows that blend comfort and style! Creating custom pillows is easier than you might think. Grab some fabric in your favorite patterns and either sew or glue them into vibrant pillow covers. For a no-sew option, fabric glue works perfectly to secure edges. Enhance your pillows with embellishments like pom-poms or tassels for a playful touch!
To implement this fun project, choose fabrics that resonate with your decor theme. Mixing and matching patterns can create an eclectic look that’s visually appealing. Using pillow inserts ensures a plush feel, making your space cozier and more inviting.
Here are some tips to get started:
– Choose fabrics that match your decor theme.
– Mix and match patterns for a fun look.
– Use pillow inserts for a plush feel.
These personalized pillows not only add comfort but also serve as eye-catching decor elements that reflect your personality.
Personalized throw pillows are the quickest mood booster for any room. DIY home decor becomes effortless when you mix favorite patterns and a bit of fabric glue—no sewing required. Create cozy, unique accents that shout ‘you’ without breaking the budget.
📹 Related Video: HOW TO CUSTOMIZE YOUR THROW PILLOW DIY. PART ONE
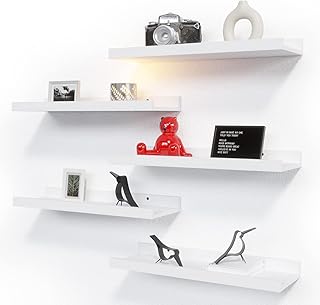
5. Decorative Wall Shelves
Transform your walls into a creative display with decorative wall shelves! These functional pieces not only hold your favorite decor items but also serve as a canvas for artistic expression. Using reclaimed wood or floating shelves, you can create an elegant look that showcases plants, books, and cherished mementos. Mixing different sizes and shapes adds an artistic flair, making your walls a focal point in any room.
For a successful shelving project, secure installation is key—use a stud finder to ensure stability. Arrange items at varying heights for a balanced yet dynamic appearance, and consider painting or staining shelves to match your decor style. This project aligns with the trend of personalization and creativity in home decor.
Here are some tips to enhance your shelves:
– Use a stud finder for secure installation.
– Arrange items in varying heights for a balanced look.
– Paint or stain shelves to match your decor style.
Incorporating decorative items on your shelves not only enhances visual interest but also tells a story about your unique style.
Decorative Wall Shelves
Editor’s Choice


6. Upcycled Glass Jars
Give new life to glass jars by turning them into charming decor pieces! Upcycling glass jars adds a rustic touch to your home while being eco-friendly. You can paint them, wrap them in twine, or transform them into candle holders or vases. These versatile jars are perfect for organizing small items or showcasing beautiful blooms, making them practical and stylish additions to your decor.
To make the most of your upcycled glass jars, spray paint them for a smooth finish. Wrapping jars with natural twine creates a rustic vibe, while adding fairy lights inside can create a magical ambiance. This project is a great way to repurpose items you already have and incorporate them into your decor.
Consider these ideas to elevate your jars:
– Use spray paint for an even finish.
– Wrap jars with natural twine or rope for a rustic look.
– Include fairy lights inside for a magical ambiance.
These charming jars not only enhance your decor but also provide a sustainable option for home organization.
Upcycled Glass Jars
Editor’s Choice


7. DIY Terrariums
Invite a bit of nature into your home with DIY terrariums! These miniature gardens are a delightful way to bring greenery indoors without requiring much space. All you need are small plants, a clear glass container, and a layer of stones for drainage. Adding decorative elements like tiny figurines or colored sand can personalize your terrarium, making it a unique piece of living decor.
For a successful terrarium, choose low-maintenance plants like succulents that thrive in this environment. Ensure good drainage by using rocks at the bottom, and place your terrarium in indirect sunlight to keep the plants healthy. This project not only beautifies your space but also adds a touch of tranquility.
Here are some tips to create your terrarium:
– Choose low-maintenance plants like succulents or air plants.
– Ensure good drainage with rocks at the bottom.
– Keep the terrarium in indirect sunlight.
Your DIY terrarium will not only enhance your decor but also purify the air, making your home feel more vibrant and alive.
8. Creative Gallery Wall
Craft an eye-catching gallery wall that tells your unique story! A gallery wall is a wonderful way to display personal photos, artwork, and cherished memorabilia. Mixing different frame styles and sizes brings visual interest, allowing you to showcase everything from black-and-white photos to colorful art pieces. This project is all about self-expression, transforming a blank wall into an inspiring focal point.
To create your gallery wall, lay out your arrangement on the floor before hanging. Using painter’s tape to outline the spaces on the wall can help visualize the layout. Incorporating three-dimensional elements like small shelves adds depth to your display, creating a dynamic visual experience.
Consider these tips for your gallery wall:
– Lay out your arrangement on the floor before hanging.
– Use painter’s tape to outline spaces on the wall.
– Incorporate 3D elements like small shelves.
Your personalized gallery wall will not only beautify your space but also evoke cherished memories and inspire conversations with guests.
9. Decorative Candle Holders
Illuminate your home with elegant DIY candle holders that add warmth and charm! Crafting your own candle holders can instantly enhance your decor while creating a cozy ambiance. Use materials like wood, glass, or terracotta pots, and personalize them with paint or embellishments to suit your style. Whether hosting a dinner party or enjoying a quiet evening, these holders will cast a beautiful glow in any setting.
For a successful project, ensure the holder is stable to prevent tipping over. Experimenting with different heights creates a visually appealing display, while using scented candles can add an inviting fragrance to your space. This DIY project aligns with the current trend of personalized home decor.
Here are some tips to create your candle holders:
– Ensure the holder is stable to avoid tipping.
– Experiment with different heights for a dynamic display.
– Use scented candles for added aroma.
Your handmade candle holders will not only serve a practical purpose but also elevate the overall atmosphere of your home.
How To Choose Budget-Friendly DIY Home Decor
When it comes to DIY home decor, you want to create a space that reflects your style without breaking the bank. With so many options available, choosing the right decor can feel overwhelming. Here’s a guide to help you make wise choices while staying within your budget.
1. Prioritize Your Style
Before starting your DIY projects, it’s essential to determine your personal style. Are you drawn to bohemian vibes, modern minimalism, or rustic charm? Identifying your style will help you select decor items that complement each other. Browse Pinterest, home decor blogs, or magazines for inspiration and create a mood board to visualize your ideas.
2. Assess Your Space
Take a good look at the space you want to decorate. Measure the dimensions of your room and consider how much space you have for new items. Too many pieces can make your room feel cramped. Choose decor that enhances the space without overwhelming it. For example, a large statement piece can be effective, but too many smaller items can clutter the aesthetic.
3. Choose Affordable Materials
The materials you choose for your DIY projects can greatly impact your budget. Look for affordable options like reclaimed wood, thrifted items, or inexpensive fabric. You can often find these materials at local thrift stores, garage sales, or online marketplaces. For instance, old wooden pallets can be transformed into beautiful furniture or wall art.
4. Opt for Easy Projects
Select projects that fit your skill level. If you’re new to DIY, start with simple projects like painted canvas art or personalized throw pillows. These projects usually require minimal supplies and can be done in a few hours. More complicated projects, like upcycled furniture, may take more time and skill. Gradually challenge yourself as you build confidence.
5. Set a Budget
Before diving into your DIY decor projects, decide on a budget. Determine how much you can spend overall and allocate specific amounts for different items or projects. This will help you avoid overspending. Remember to account for tools and materials in your budget as well. Keep an eye out for sales or discounts to make the most of your money.
6. Plan for Versatility
When choosing decor, consider pieces that can serve multiple purposes. For instance, decorative storage baskets can hold items while also adding a stylish touch. Look for items that can be easily updated with a fresh coat of paint or new fabric. This way, you can change the look of your decor without needing to buy entirely new pieces in the future.
Pro Tip: When shopping for materials or items, always keep an eye out for sales and discounts. Sign up for newsletters from local craft stores or home improvement retailers to receive promotions and coupons that can help you save even more on your DIY projects.
By following these steps, you’ll be well on your way to creating beautiful, budget-friendly DIY home decor that truly reflects your personal style. Remember, the goal is to enjoy the process and let your creativity shine!
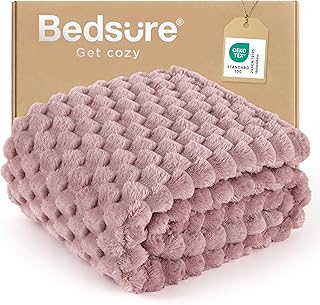
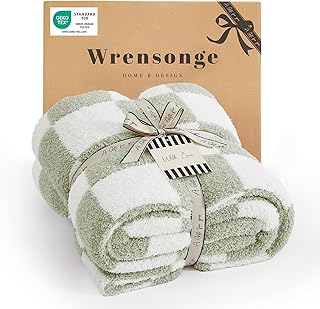
10. Cozy Blanket Ladder
Add both functionality and style to your home with a cozy blanket ladder! This DIY project is perfect for neatly displaying your favorite throws while adding character to your space. You can use scrap wood or repurpose an old wooden ladder, sanding it down and painting or staining to match your decor. Lean the ladder against a wall and drape your blankets for a charming, organized look.
For successful implementation, ensure the ladder is stable and secure, especially if it will hold heavier blankets. Mixing different colors and textures of blankets can create a visually appealing display, and consider adding hooks for accessories to maximize functionality. This project embraces the trend of cozy, lived-in decor.
Here are some tips to style your blanket ladder:
– Ensure the ladder is stable and secure.
– Use different colors and textures of blankets.
– Consider adding hooks for accessories.
This cozy blanket ladder will not only keep your favorite throws accessible but will also enhance the warmth and charm of your living space.
Cozy Blanket Ladder
Editor’s Choice


You might also like


11. Hand-Painted Flower Pots
Bring your garden indoors with hand-painted flower pots that showcase your creativity! This DIY project allows you to personalize your planters while adding a splash of color to your home. Using terracotta pots and vibrant acrylic paints or spray paint, you can create stunning designs that reflect your style. Experimenting with techniques like sponging or stenciling can result in beautiful patterns that make your plants pop.
To achieve the best results, seal the paint with a waterproof sealer if the pots will be used outdoors. Opt for non-toxic paint to ensure safety, and consider adding a layer of gravel at the bottom for proper drainage. This project aligns with the trend of incorporating greenery into home decor.
Consider these steps to create your flower pots:
– Seal the paint with a waterproof sealer if outdoors.
– Use non-toxic paint for safety.
– Consider adding a layer of gravel for drainage.
Your hand-painted flower pots will not only brighten your home but also serve as a beautiful showcase for your favorite plants.
12. DIY Fabric Wall Art (You Won’t Believe!)
Create stunning fabric wall art that will impress your guests! This easy DIY project allows you to use your favorite fabric to craft a large statement piece for your wall. Stretch the fabric over a canvas or wooden frame, securing it at the back for a polished look. Mixing and matching different fabrics can create a beautiful quilted effect, while stencils can add unique patterns. This is a fantastic way to infuse color and texture into your space without spending a fortune!
To get started, choose fabrics that coordinate with your room’s color scheme. A staple gun makes securing the fabric easy, and layering multiple pieces can add depth to your art. This project embodies the trend of personalized decor and creativity.
Consider these steps to create your fabric wall art:
– Choose fabrics that coordinate with your room’s color scheme.
– Use a staple gun for easy securing.
– Consider layering multiple pieces for depth.
Your fabric wall art will not only be a visual treat but also a personal touch that reflects your style.
13. Reclaimed Wood Signs
Add character to your home with charming reclaimed wood signs! This DIY project is perfect for those who love a rustic or farmhouse vibe. Using old pallets or leftover wood, you can create personalized signs for your kitchen, living room, or garden. Sand the wood to smooth out rough edges, paint or stencil your desired text, and display your creation. This project not only expresses your personality but also promotes sustainability by repurposing materials.
For a successful sign, consider using weathered wood for a more rustic appearance. Stenciling letters can give a clean finish, and adding hooks can make your sign functional. This aligns with the growing trend of personalized, handmade decor.
Here are some steps to create your wood signs:
– Use weathered wood for a more rustic look.
– Stencil letters for a clean finish.
– Consider adding hooks to make it functional.
Your reclaimed wood signs will not only beautify your home but also tell a story, making your space feel more inviting.
14. DIY Photo Frame Collage
Showcase your favorite memories with a DIY photo frame collage that adds personality to your space! Gather an assortment of frames, mixing sizes and styles for visual interest. You can paint them all the same color for a cohesive look or leave them in their original state for an eclectic vibe. Arrange the frames on your wall in a creative layout that tells your family’s story or captures cherished moments. This personalized touch will make your home feel warm and inviting.
To start, use a paper template to plan your layout before hanging anything. Consider themes for your photos, such as vacations or family gatherings, to create a cohesive narrative. Adding small decor items within the arrangement can enhance the visual depth of your display.
Consider these tips for your photo frame collage:
– Use a paper template to plan your layout.
– Consider themes for your photos (vacations, family, etc.).
– Add small decor items in the arrangement for depth.
Your photo frame collage will not only display your favorite moments but also serve as a beautiful focal point that reflects your family’s journey.
15. DIY Memory Board
Create a DIY memory board to celebrate your favorite moments in a fun and interactive way! Using a corkboard or a large frame with wire, you can clip photos, notes, and memorabilia for a personalized decor piece. Paint the board in your favorite color to make it unique, and update it regularly with new memories as they come. This project adds a nostalgic and joyful vibe to your space, perfect for any room in the house.
To enhance your memory board, use colorful clothespins or clips for an eye-catching pop. Adding decorative tassels or ribbons can provide extra flair, making the board visually appealing. This project embodies the trend of personalization and creativity in home decor.
Here are some steps to create your memory board:
– Use colorful clothespins or clips for a pop of color.
– Include decorative tassels or ribbons for extra flair.
– Change out items regularly to keep it fresh.
Your DIY memory board will not only keep your cherished moments visible but also serve as a beautiful decoration in your home.
16. Hand-Painted Mason Jars
Give your mason jars a fresh look with hand-painting for a personal touch! Mason jars are incredibly versatile, serving as decor, storage, or gifts. By painting them in fun colors and patterns, you can create unique vases, storage containers, or even candle holders. Use chalk paint for a matte finish, and add twine or embellishments for a rustic charm. This project is simple, fun, and can be completed in just a few hours!
To get the best results, choose paint that is suitable for glass, ensuring it adheres well. Clean and dry the jars thoroughly before painting, and experiment with different techniques for unique designs. This aligns with the trend of upcycling and personalized decor.
Here are some tips for painting your mason jars:
– Use paint that is suitable for glass.
– Ensure the jars are clean and dry before painting.
– Experiment with different painting techniques for unique looks.
Your hand-painted mason jars will not only add color to your decor but also provide functional storage solutions that reflect your creativity.
17. DIY Woven Wall Baskets
Introduce depth and dimension to your decor with DIY woven wall baskets! These charming pieces can be created by weaving or using pre-made wicker baskets. Hang them in a creative pattern or solo for a bohemian vibe, filling them with faux greenery or leaving them empty for a minimalist look. Not only do they enhance your decor, but they can also provide storage for smaller items, merging functionality with style.
To create an eye-catching arrangement, mix different sizes and textures of baskets for visual interest. Choosing a color palette that matches your room will enhance the overall design. This project aligns with the trend of incorporating natural materials in home decor.
Consider these steps to create your woven wall baskets:
– Mix different sizes and textures for visual interest.
– Choose a color palette that matches your room.
– Use command hooks for easy hanging.
Your DIY woven wall baskets will not only serve as a stylish decor element but also add a touch of warmth and character to your walls.
18. Painted Wooden Blocks
Craft colorful painted wooden blocks for playful decor that brightens up any room! Wooden blocks can be transformed into personalized pieces by painting them in vibrant colors and patterns. Use them as bookends, shelf decor, or even educational tools for young children. With creative designs and a few coats of paint, you can mix and match colors, create words, or paint fun shapes on each block. This project is simple, inexpensive, and a wonderful way to bring color into your home!
To ensure a smooth finish, sand the edges of the blocks before painting. Using non-toxic paint is essential if the blocks are intended for children. This aligns with the trend of playful and colorful decor in children’s spaces.
Consider these tips for your painted wooden blocks:
– Use non-toxic paint if for children.
– Sand edges for a smooth finish.
– Consider stenciling letters or shapes.
Your colorful painted blocks will not only add vibrancy to your home but also serve as fun and educational decor for kids.
Fun fact: A set of 6 painted wooden blocks can brighten a room for under $15, turning shelves into playful learning corners. Mix colors, spell words, and swap patterns to refresh your DIY home decor without breaking the bank.
You Might Also Like


19. String Art Creations
Get crafty with string art that adds a unique touch to your decor! This fun and creative project allows you to express yourself through intricate designs made with colorful strings and nails on a wooden board. Choose a shape or letter that resonates with you, hammer in the nails, and wrap the string around them to form your desired design. This relaxing activity not only results in beautiful art but also personalizes your space in a meaningful way.
To make your string art shine, use a pattern to guide your nail placement for a neat finish. Experimenting with different colors of string can create stunning visual effects, and consider adding a painted background for added drama. This project embodies the trend of hands-on creativity in home decor.
Consider these tips for your string art project:
– Use a pattern to guide your nail placement.
– Experiment with different colors of string.
– Consider adding a painted background for more drama.
Your string art creations will not only beautify your walls but also serve as a reflection of your artistic flair.
Did you know a simple string art piece can personalize your space in under an hour for under $20? In DIY home decor, nail-and-string designs let you turn a wooden board into a one-of-a-kind statement that reflects you.
String Art Creations
Editor’s Choice


20. Fabric-Covered Bulletin Board
Create a fabric-covered bulletin board that combines function with flair! This DIY project allows you to keep important notes organized in style. Start with a corkboard and staple your favorite fabric over it, pulling it tight to avoid wrinkles. Adding ribbons can help create sections for notes and pictures, making it both practical and decorative. This project not only keeps you organized but also serves as a charming piece of decor in your home.
To enhance your bulletin board, choose fabric that complements your decor, and consider using decorative buttons or embellishments for an extra touch. Hanging it in a common area ensures that important reminders remain visible and adds a personal touch to your space. This aligns with the trend of functional yet stylish home decor.
Consider these steps for your bulletin board:
– Choose fabric that complements your decor.
– Use decorative buttons or embellishments for an extra touch.
– Hang it in a common area to keep important reminders visible.
Your fabric-covered bulletin board will not only keep you organized but also add a stylish element to your home.
21. DIY Coasters
Protect your surfaces with stylish DIY coasters that showcase your creativity! Creating coasters can be a fun and practical project. Use cork, wood, or ceramic tiles as your base, and let your imagination run wild with paint, decoupage, or even resin to make each set unique. Not only do they serve a practical purpose, but they can also add a pop of color to your coffee table or dining area.
To ensure durability, seal your coasters with a waterproof finish. Personalizing them as gifts can make them even more special, and mixing different materials creates a fun and eclectic set. This project aligns with the trend of personalized, handmade home accessories.
Consider these tips for creating your coasters:
– Seal with a waterproof finish for longevity.
– Consider personalizing coasters as gifts.
– Mix and match different materials for a fun set.
Your DIY coasters will not only protect your surfaces but also elevate your decor with their unique designs.
22. Decorative Flower Arrangements
Create stunning decorative flower arrangements using faux or real blooms that breathe life into your space! Arranging flowers allows for customization to match your decor theme. Choose your favorite flowers, greenery, and a suitable container to craft a beautiful arrangement. Mixing textures and colors can create lovely contrasts that uplift your home, and using faux flowers means your arrangements last indefinitely!
To enhance your arrangements, choose a theme, such as seasonal colors or specific flower types. Using floral foam can help stabilize your arrangement, while varying heights and angles adds interest. This project aligns with the trend of bringing natural elements into home decor.
Consider these steps for crafting your flower arrangements:
– Choose a theme, like seasonal colors or specific flower types.
– Use floral foam for a sturdy arrangement.
– Experiment with different heights and angles for interest.
Your decorative flower arrangements will not only beautify your home but also create a warm and inviting atmosphere.
23. Upcycled Picture Frames
Breathe new life into old picture frames with a stylish makeover that enhances your decor! Old frames can be transformed into decorative pieces with some paint and creativity. Consider creating a collage of frames or painting them in bold colors to use as standalone decor. You can even use frames to hold fabric or other materials for unique wall art. This project not only revitalizes old items but also promotes eco-friendliness.
For best results, mix frame styles for a unique look, and consider using chalk paint for a vintage finish. Layering different shapes can create an eye-catching display, aligning with the trend of personalized and artistic decor.
Consider these steps for your frame upcycling:
– Mix frame styles for a unique look.
– Consider using chalk paint for a vintage finish.
– Experiment with layering different shapes.
Your upcycled picture frames will not only add character to your home but also serve as a reflection of your personal style.
Upcycled Picture Frames
Editor’s Choice


24. DIY Pet Bed
Create a cozy spot for your furry friend with a DIY pet bed that combines comfort with style! This rewarding project allows you to use soft fabric and old cushions, or even craft a wooden frame for a chic design. Personalize it with your pet’s name or a fun print to make it truly special. This DIY solution not only saves money but also ensures your pet has a comfy place to rest.
To ensure practicality, use machine-washable fabrics for easy cleaning and consider your pet’s size when determining dimensions. Adding a cozy blanket inside will enhance comfort, making this project a delightful addition to your home. This aligns with the trend of incorporating pet-friendly elements into home decor.
Here are some steps to create your pet bed:
– Use machine-washable fabrics for easy cleaning.
– Consider your pet’s size for the right dimensions.
– Add a cozy blanket inside for extra comfort.
Your DIY pet bed will not only provide a comfortable resting spot for your furry friend but also blend seamlessly with your home’s decor.
25. Seasonal Decor Swaps
Keep your home feeling fresh and trendy with seasonal decor swaps that reflect the changing seasons! Rotating your decor with items like pumpkins in fall, pinecones in winter, flowers in spring, and seashells in summer is a simple way to keep your space inviting. You don’t need to buy new items; instead, swap decor you already have and repurpose it creatively. This project breathes life into your home and ensures you’re always ready for guests!
To make it easier, store seasonal items in labeled bins for quick swaps. Incorporating fresh elements like flowers or herbs can enhance the seasonal vibe, and being creative with color palettes for each season keeps things lively. This aligns with the trend of dynamic and interactive home decor.
Here are some tips for your seasonal decor swaps:
– Store seasonal items in labeled bins for easy swaps.
– Incorporate fresh elements like flowers or herbs.
– Be creative with color palettes for each season.
Your seasonal decor swaps will not only keep your home looking beautiful but also create an inviting atmosphere that changes with the seasons.
Conclusion
Transforming your home with these budget-friendly DIY home decor ideas is not just a way to revamp your space but also a chance to express your creativity and personality.
By engaging in these projects, you not only save money but also create a home that feels uniquely yours. So, pick your favorites from this list and start crafting your dream space today!
Note: We aim to provide accurate product links, but some may occasionally expire or become unavailable. If this happens, please search directly on Amazon for the product or a suitable alternative.
This post contains Amazon affiliate links, meaning we may earn a small commission if you purchase through our links, at no extra cost to you.
Frequently Asked Questions
What are some budget-friendly DIY home decor ideas that are easy for beginners?
There are plenty of starter-friendly ideas that fit the DIY home decor topic and won’t break the bank. For example, update a dull wall with painted canvas art or simple geometric shapes using painter’s tape; repurpose glass jars with chalk paint and twine for candle holders or vases; build a lightweight floating shelf from inexpensive planks; cover a cork board with fabric for a chic bulletin board; or refresh throw pillows with fabric scraps. Start with one easy project, gather affordable supplies, prep surfaces, and follow a few straightforward steps. These ideas keep things budget-friendly and emphasize easy projects you can complete in a weekend.
Which DIY decor idea from the article is most transformative for small spaces on a budget?
For many, mirrors are magic—hang a slim wall mirror to bounce light and visually enlarge the room.
Vertical wall shelves or tiered plant hangers save floor space, while light-weight, multi-use furniture (like a stool that doubles as a side table) maximizes function without clutter.
All of these are classic easy projects that deliver big impact with budget-friendly results. Start by measuring wall space and choosing one feature to implement this weekend.
How can I start a DIY home decor project if I have limited time or tools?
Choose 1–2 hour projects that use common supplies, like painting a small accent board, remaking a lampshade with fabric, or turning glass jars into candle holders.
Use ready-made kits or upcycle items you already own to keep costs down.
Work in short sessions, align projects with your existing color palette, and focus on one finish at a time.
This keeps the process stress-free and super practical for busy schedules.
What tools and supplies are essential for budget-friendly DIY home decor?
Keep a small, versatile toolkit: basic scissors, ruler, pencil, craft knife, sandpaper, paint brushes, and a hot glue gun.
Add painter’s tape, acrylic or chalk paint, a small paint tray, and a clear sealant for durability.
For textiles, pick up a basic sewing kit and a few coordinating scraps.
Source cheaply from thrift stores, dollar stores, or discount craft aisles to stay in the budget-friendly realm.
How can I avoid common mistakes and ensure a polished look with DIY home decor?
Plan before you paint or glue—test color swatches on a hidden area and measure twice.
Prep surfaces well, sand rough spots, and wipe away dust.
Use painter’s tape for clean edges, apply finishes in thin coats, and seal textiles to prevent fraying.
Choose cohesive color schemes and textures to keep your DIY home decor look cohesive. Take your time and enjoy the process.
Related Topics
DIY home decor
budget-friendly
easy projects
home transformation
upcycling decor
interior styling
beginner friendly
affordable crafts
minimalist decor
seasonal decor
quick makeovers
creative spaces


