
Have you ever found yourself daydreaming about enchanted forests, talking animals, and magical castles? I know I have! With the holiday season around the corner and more time spent indoors, I felt inspired to create something whimsical that brings those fairy tale dreams to life. That’s why I put together this list of 13 easy DIY fairy tale decor projects that your kids can help create!
If you’re a parent, grandparent, or caregiver who loves the idea of adding a little magic to your home, this post is for you. You want to engage your kids in fun and imaginative activities that spark their creativity. Plus, you probably want to avoid those endless screen times that seem to take over our lives. These projects offer a perfect solution, blending creativity and quality time together.
What can you expect? Each project is designed to be simple, engaging, and filled with charm. You and your little ones will enjoy crafting delightful decor that turns your space into a wonderland. From fairy lights to magical wall art, these ideas are not only fun to make but also help children express their imagination. So, gather your supplies, roll up your sleeves, and let’s dive into a world where your home transforms into a fairy tale sanctuary!
1. Enchanted Fairy Jar

Bring a sprinkle of magic into your home with enchanted fairy jars! These adorable creations transform simple glass jars into sparkling wonders. Gather your kids and let them dive into a world of creativity as they fill jars with glitter, tiny LED lights, and charming miniature fairies or woodland creatures.
Start by cleaning out your jars thoroughly and peeling off any labels. Let your kids choose their favorite colors of glitter to sprinkle inside. Next, place the LED lights and their chosen figures inside the jar. This hands-on project not only sparks imagination but also helps improve fine motor skills as they carefully arrange the small items.
You can create a whole collection by customizing each jar with different themes! Consider using fairies, unicorns, or adorable woodland animals. Hang them around the room or display them on shelves to enjoy a whimsical glow at night.
Here are some practical tips to ensure your fairy jars shine bright:
• Use battery-operated lights for safety, especially in kids’ rooms.
• Choose colorful glitter to match your child’s favorite themes.
• Pick small decorations like toy animals or fairy figurines for variety.
• Add ribbons or fabric at the top for that final touch of charm.
These enchanting jars not only create a delightful ambiance but also provide a wonderful bonding experience for you and your kids. Get ready to light up your space with magical creativity!
Enchanted Fairy Jar
Editor’s Choice

Brightown 12 Pack LED Fairy Lights Battery Operated String Lights – 7ft …

LEOBRO Glitter, Fine Glitter for Resin, Set of 32 Colors, for Nail Body …

Suartus Miniature Fairy Figurines – 4Pcs Small Flower Fairies Ornaments …
2. DIY Castle Wall Art

Create a magical atmosphere in your child’s room with a fun DIY Castle Wall Art project! This activity not only sparks creativity but also adds a unique touch to their space. With just a few materials like cardboard, paint, and glitter, you can transform a plain wall into a fairy-tale masterpiece.
Start by cutting out various castle shapes, including turrets and flags, from cardboard. Let your little ones unleash their imagination by painting them in bright, cheerful colors. You can even sprinkle some glitter on top for that royal sparkle! Once everything is dry, stick the pieces to the wall using double-sided tape or removable adhesive strips. This easy change can make the room feel like a fantasy land, as seen in popular DIY ideas on Pinterest.
For a budget-friendly approach, consider using recycled cardboard from boxes you already have at home. This keeps costs low while teaching kids the importance of reusing materials. You can also swap out the castle designs whenever your child wants a new theme, keeping their room fresh and exciting. This project is perfect for family bonding, encouraging teamwork as you and your kids plan the layout together.
• Cut out various castle shapes for creativity
• Use bright colors and glitter for fun details
• Apply removable tape for easy wall decoration
• Change designs to keep the room feeling fresh
DIY Castle Wall Art
Editor’s Choice

10 EcoSwift 8.5×11 Chipboard Cardboard Craft Scrapbook Material Scrapboo…

55PCS Acrylic Paint Set of 36 Colors 2fl oz 60ml Bottles 12 Brushes,Non …

Resurhang 20 Pcs Glitter Glue Pens Bulk 10 Colors Rainbow Glue Stick for…
3. Fairy Tale Bookshelf

Create a magical reading space with a fairy tale bookshelf! Transform a plain old shelf into a whimsical display that sparks your child’s imagination. Start by painting it in soft pastels or vibrant rainbow hues, reflecting the enchanting worlds found in their favorite stories. Adding character-themed decorations, like stickers or cut-out images, can bring beloved storybook heroes to life. You might even name each shelf after a fairy tale character, turning reading time into an adventure.
To get started, gather some basic supplies. Choose non-toxic paint for safety and let your kids help with the brushwork. You can use inexpensive character stickers or print images from the internet. This project is budget-friendly too! Thrift stores often have shelves just waiting for a new look. Plus, organizing books in a fun way teaches kids valuable lessons about tidiness and responsibility, all while making their reading corner feel special.
• Paint the shelf in cheerful colors to brighten up the room.
• Use stickers or printed images of favorite characters for a personal touch.
• Label each shelf with character names for added fun and creativity.
• Involve your kids in the project to boost their excitement and ownership.
This fairy tale bookshelf not only enhances your child’s reading experience but also adds a splash of creativity to your home. It’s a delightful way to blend learning with imagination, making your reading nook a cherished spot for stories and adventure.
Fairy Tale Bookshelf
Editor’s Choice

Crayola Washable Kids Paint (6ct), Essential Preschool Supplies, Paint S…

200pcs Kids Disney Princess Cute Cartoon Character Stickers – Movie Deco…

Brother P-Touch PTD220 Home/Office Everyday Label Maker | Prints TZe Lab…
4. Whimsical Mobile

Create a whimsical mobile that brings a touch of magic to your child’s room! Picture vibrant stars, glowing moons, and playful fairy tale creatures dancing gently above their bed. Using lightweight materials like colorful paper or soft felt, you and your kids can craft a delightful piece that not only decorates but also sparks imagination.
Start by cutting out fun shapes together. Let your kids unleash their creativity with markers, glitter, or stickers. Once the decorations are ready, tie them to a wooden hoop or an embroidery ring with bright strings. Hang it at a safe height where it can catch the soft light, creating an enchanting atmosphere for bedtime. This project is perfect for teaching balance and symmetry, all while making a beautiful focal point in their room.
Here’s how to get started without breaking the bank. Look for supplies at craft stores or around your home. You can repurpose old materials like fabric scraps or cardboard. This mobile not only enhances the decor but also creates a cozy, imaginative space perfect for sweet dreams and storytelling.
• Gather colorful paper or felt for a fun variety
• Use markers and glitter for creative decoration
• Hang at a safe height to create a dreamy effect
• Involve your kids in the crafting for bonding time
With just a bit of time and creativity, you can create a magical mobile that turns any room into a fairy tale haven. Enjoy the process, and watch as your child’s face lights up with joy!
Fun fact: DIY fairy tale mobiles can take as little as 20–40 minutes to complete with kids. A simple project using colorful paper or felt sparks hours of imagination above the bed as stars flutter and creatures peek down.
Whimsical Mobile
Editor’s Choice

Crayola Construction Paper – 480ct (2pck), Bulk Teacher Supplies, Back t…

LEOBRO Glitter, 18 Pack Fine Glitter, Craft Glitter Powder Shake Jar, Mu…

Caydo 6 Pieces Embroidery Hoop Set Circle Cross Stitch Hoop Ring 4 inch …
5. Storybook-Themed Pillow Covers

Brighten up your home with storybook-themed pillow covers that your kids can help create! These custom designs turn ordinary pillowcases into magical treasures. Imagine a cozy nook filled with colorful pillowcases featuring their favorite characters or quotes from beloved tales. You can use bright fabric paints to bring these stories to life, making bedtime a fun and whimsical experience.
Start by prepping your pillowcases. Wash and iron them to ensure a smooth painting surface. Then, gather your fabric paints and let your kids’ imaginations run wild! They can paint anything from a brave knight to a fairy princess, or even a famous quote that inspires them. This craft is perfect for kids of all ages and allows for endless creativity. Plus, it’s a fantastic way to decorate their fairy tale-themed rooms with personal touches.
To make your designs last longer, heat-set the paint once it dries. This simple step will keep those cherished creations looking fresh through many nights of stories and dreams.
Here are some tips for making your story-themed pillow covers:
Choose plain pillowcases in light colors for the best results.
Use fabric paints in vibrant colors to enhance visibility.
Incorporate favorite characters or quotes that inspire your kids.
Heat-set your designs to ensure they withstand washing.
With these easy steps, you can create a cozy, magical space that feels uniquely theirs. Every night, they’ll drift off to sleep surrounded by their favorite stories, making bedtime a cherished adventure.
Storybook-Themed Pillow Covers
Editor’s Choice

Utopia Bedding Queen Pillow Cases – 4 Pack – Envelope Closure – Soft Bru…

Shuttle Art Fabric Paint, 18 Colors Permanent Soft Fabric Paint in Bottl…

BLACK+DECKER Easy Steam Compact Iron for Clothes, Automatic Shutoff, Non…
6. Magic Wand Craft

Every enchanting fairy tale begins with a sprinkle of magic! Why not help your kids make their very own magic wands? This craft is simple and delightful, using just a few materials like sticks, ribbons, and sparkly decorations.
Start by gathering sturdy sticks from your backyard or a nearby park. You can choose sticks that are straight or have fun curves. Let your kids unleash their creativity by painting them in bright colors or covering them with glitter and washi tape. This is where the fun really begins! You can tie colorful ribbons to the top, making the wands even more whimsical. These DIY magic wands are perfect for dress-up play, and they can also brighten up your child’s room as unique decor!
This activity encourages imagination and artistic expression, allowing your little ones to feel like real wizards or fairy godmothers. Plus, every child needs a magic wand to spread joy and wonder around!
Here are some tips to make your magic wand crafting even more fun:
• Use sticks of various sizes for different looks
• Choose vibrant colors like pink, blue, or gold for painting
• Add stars or hearts cut from cardboard for extra flair
• Use natural twine or colorful yarn to tie ribbons securely
Crafting these wands is not only budget-friendly but also a great way to bond with your kids. So grab those materials, and let the magic begin!
Magic Wand Craft
Editor’s Choice

Acrylic Paint Set for Adults and Kids – 24 Pack of 12mL Paints with 3 Ar…

LIUYAXI 20 Colors 100 Yard Satin Ribbon Rolls, 2/5″ Wide 5 Yard/Roll, Ra…
LEOBRO Glitter, 18 Pack Fine Glitter, Craft Glitter Powder Shake Jar, Mu…
You might also like


7. Fairy Tale Photo Frames

Create enchanting photo frames that capture your child’s favorite fairy tale memories! Start with simple wooden frames, which you can find at craft stores or online. Let your kids unleash their creativity by decorating these frames with vibrant paints, colorful stickers, and sparkling glitter.
Think about themes that resonate with them. For example, a frame inspired by Peter Pan can be painted deep blue with shimmering stars. A Little Mermaid frame might feature seafoam green with tiny shell embellishments. These frames not only celebrate their beloved stories but also make for a delightful decor piece in their rooms.
To make this craft even more enjoyable, gather some affordable supplies. Head to your local dollar store, where you can find paints and stickers at great prices. Encourage your kids to invite friends over for a frame-decorating party. This adds a social element to the crafting fun! Once the frames are complete, print out memorable photos of your children dressed as their favorite characters and place them inside.
These personalized frames can brighten up any space, making it feel magical and inviting. They also serve as wonderful keepsakes that remind you of those cherished storybook adventures.
• Choose plain wooden frames for easy decoration
• Use vibrant paints to bring characters to life
• Add stickers and glitter for extra sparkle
• Print and display photos of kids in costume
Fun fact: 78% of kids proudly display photos in frames they helped decorate. With DIY fairy tale decor, starting from simple wooden frames and letting them paint, add stickers, and glitter turns memories into magical, shareable keepsakes.
Fairy Tale Photo Frames
Editor’s Choice

Juvale Unfinished Wood DIY Picture Frames – Holds 4 x 6 in Photo – 9.5 x…

Acrylic Paint Set, 24 Colors (2 oz/Bottle) with 12 Art Brushes, Art Supp…

Arme 600 PCS Stickers Pack,Cute Colorful Waterproof Stickers,Vinyl Art S…
8. DIY Fairy Tale Garden

Create a magical escape in your backyard with a DIY fairy tale garden! This enchanting project lets your child’s creativity shine. You can use a shallow wooden box or even an old plastic container. Fill it with rich soil and let your child choose colorful plants or flowers that remind them of their favorite stories. Imagine soft pinks and sunny yellows blossoming together, inviting butterflies and bees.
To bring their fairy tale scene to life, create tiny pathways using smooth pebbles. You can add miniature fairy houses made from twigs or small pots. How about a shimmering pond? Use colored stones to craft a little oasis. Pinterest is full of ideas for whimsical gardens, so let your imagination run wild. This project not only beautifies your outdoor space but also teaches your child about nature and responsibility as they care for their plants.
Start this journey together and watch as their fairy tale garden inspires new stories and adventures. It’s a perfect way to spark their imagination and create lasting memories!
Here are some practical tips to get started:
Choose a container that suits your space; think small for a cozy feel.
Pick plants like succulents or marigolds that are easy to care for.
Add decorative accents like small stones, shells, or themed figurines.
Place the garden where it can be easily seen and enjoyed every day.
Get ready for a fun-filled project that transforms your space into a magical retreat!
DIY Fairy Tale Garden
Editor’s Choice

Tardigrade 200 Pieces Fairy Garden Accessories, Fairy Garden Kit, Fairy …

HOME GROWN Succulent & Cactus Seed Kit for Planting – [Enthusiasts Favor…

2.5 lbs Drainage Rocks for Potted Plants, 1/5 Inch Small Pebbles for Ind…
9. Starry Night Canopy

Create a dreamy escape for your child with a DIY starry night canopy! This enchanting project turns their bed into a celestial retreat. Imagine soft, sheer fabric or delicate tulle hanging above, casting a magical glow. Choose calming colors like deep blues or soft purples to mimic the night sky. You can even find inspiration from Pinterest, where families showcase their own fairy tale creations.
To start, measure how far down you want the canopy to hang. Attach the fabric to the ceiling using hooks or a sturdy curtain rod. Let your kids get creative! They can add glowing stars, fairy lights, or even paper lanterns inside the canopy. This cozy space becomes a perfect reading nook or a hideaway for imaginative adventures. It not only enhances their room’s style but also inspires dreams filled with wonder and excitement.
Here are some tips to make your starry night canopy project a success:
Choose sheer fabric for a magical effect. Opt for tulle or chiffon to let light filter through.
Use battery-operated fairy lights. These lights are safe and create a soft, twinkling glow.
Involve your kids in decorating. Let them hang stars or add personal touches to make it theirs.
Keep it budget-friendly. Look for materials at craft stores or even repurpose old curtains.
With a little creativity and teamwork, your child’s room will become a haven for dreams, making bedtime a delightful experience!
Starry Night Canopy
Editor’s Choice

White Tulle Fabric Rolls, 54 Inch by 10 Yards (30 ft) Tulle Ribbon for W…
Brightown 12 Pack LED Fairy Lights Battery Operated String Lights – 7ft …

Super Z Outlet 8″ Colorful Assorted Chinese/Japanese Hanging Paper Lante…
10. Fairy Garden Door

Imagine your child’s face lighting up at the sight of a secret fairy garden door! This enchanting project is a fantastic way to inspire creativity and spark imaginations. To make this whimsical entrance, you can use materials like wood or thick cardboard. Cut out a charming door shape, and let your kids unleash their artistic flair by painting it in bright colors. Add fun embellishments like buttons, beads, or colorful stickers for that extra magic. Once finished, find a low spot on a wall or tree trunk to attach it. This will create a magical portal that invites dreams of fairies and adventures.
Here’s how to bring this idea to life without breaking the bank. Grab some scrap wood from your garage or thick cardboard from a delivery box. You can even use leftover paint from other projects, making this a budget-friendly activity. Consider looking for inspiration on platforms like Pinterest, where these tiny doors have become a delightful trend. Not only will this project beautify your garden, but it will also create a cozy nook for storytelling. Your kids will love leaving little notes or treats for their fairy friends, adding to the fun!
• Cut out a door shape from wood or cardboard for a base
• Let kids paint with bright colors to express themselves
• Add embellishments like buttons or beads for extra charm
• Place the door low on a wall or tree trunk to invite magic
Fairy Garden Door
Editor’s Choice

Wood Carving Kit, 23pcs Wood Carving Tools with 4 Wood Carving Knives 5 …
Acrylic Paint Set, 24 Colors (2 oz/Bottle) with 12 Art Brushes, Art Supp…

60 Pieces Rhinestone Buttons,Faux Pearl Embellishments Buttons,Flat Back…
You Might Also Like


11. DIY Crown Headbands

To start this project, cut out simple crown shapes from cardstock. Show your little ones how to decorate them using paint or glitter. Once they finish, simply attach elastic bands to either side to create a comfortable fit. This is a budget-friendly craft that helps spark creativity. Plus, it’s a great way for kids to learn about different themes, like princesses, knights, or even magical creatures. The best part? These crowns make every day feel like a fairy tale!
• Cut crown shapes from colorful cardstock for variety.
• Decorate with glitter and jewels for sparkle.
• Use elastic bands for an easy, adjustable fit.
• Encourage themed designs for endless creative play.
This project not only fosters creativity but also builds memories. Imagine your little ones proudly wearing their crowns, feeling like royalty in their very own fairy tale world!
Fun fact: 8 out of 10 kids show more confidence after crafting their own crown headbands in a DIY fairy tale decor session. When kids pick colors, paint, and gemstones, imagination flourishes and playtime feels royal—and it’s a fantastic screen-free activity.
DIY Crown Headbands
Editor’s Choice

Astrobrights Colored Cardstock, 8.5” x 11”, 65 lb / 176 gsm, “Spectrum” …
LEOBRO Glitter, 18 Pack Fine Glitter, Craft Glitter Powder Shake Jar, Mu…

Elastic Bands for Sewing White 1 Inch 12 Yard High Elasticity Knit Spool…
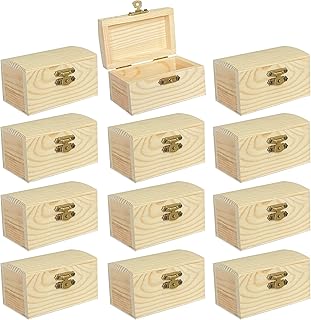
12. Magical Treasure Boxes

Create enchanting treasure boxes that spark your child’s imagination! These magical containers are perfect for storing tiny trinkets or hidden treasures. You can start with small wooden boxes, easily found at craft or dollar stores.
Let your kids unleash their creativity by painting the boxes in shimmering colors. Think bright pinks, deep blues, or even glittery golds. They can also stick on colorful stickers or jewels for that extra touch of magic. To make it even more thrilling, have your kids jot down a list of treasures they plan to hide inside. This can turn into a fun treasure hunt game later on!
Not only does this project boost creativity, but it also gives your kids a special place to keep their valuables. Each treasure box can reflect their favorite fairy tale theme—be it pirates, fairies, or dragons!
Here are some easy tips to help you get started:
Choose small wooden boxes from craft stores for a sturdy base.
Add vibrant paint colors and embellishments like stickers or gems.
Encourage your kids to design boxes based on their favorite stories.
Write down planned treasures to make the hunt exciting!
This activity is not just fun; it builds memories. Imagine the joy on your child’s face when they discover their hidden treasures. These treasure boxes will be more than just storage—they’ll be special keepsakes full of imagination and adventure!
Magical Treasure Boxes
Editor’s Choice
12 Pieces Small Wooden box Unfinished Wood Treasure Boxes with Lid for D…
Acrylic Paint Set, 24 Colors (2 oz/Bottle) with 12 Art Brushes, Art Supp…

3D Stickers for Kids & Toddlers, 920+ 3D Puffy Stickers 36 Different She…
13. Fairy Tale Star Lanterns

Bring a sprinkle of magic to your child’s room with charming fairy tale star lanterns! These delightful decorations not only brighten the space but also create enchanting shadows that dance on the walls. You can use colorful paper or plastic lanterns, which are easily found at craft stores or online.
To start, gather your materials. Cut out star shapes from colored paper. Let your kids glue these stars onto the lanterns. You can even use paint to add their favorite characters for a personal touch. Place tiny LED candles or fairy lights inside for a soft glow that twinkles at night. This project is not just about making a light; it’s about sparking creativity and providing a cozy, whimsical atmosphere for bedtime.
Here’s how to make these lanterns a reality without breaking the bank. You can find supplies at local craft stores or even use items you already have at home. If you’re on a budget, consider repurposing old jars or boxes. These lanterns fit beautifully into any fairy tale theme, making the room feel dreamy and inviting.
• Gather materials: Use paper, plastic lanterns, or jars
• Cut and glue: Create star shapes with your kids
• Add lights: Use LED candles or fairy lights inside
• Personalize: Paint characters or designs they love
With these easy steps, you’ll light up your child’s room and their imagination, making bedtime feel like an adventure in their own fairy tale!
Fairy Tale Star Lanterns
Editor’s Choice
Brightown 12 Pack LED Fairy Lights Battery Operated String Lights – 7ft …
Crayola Construction Paper – 480ct (2pck), Bulk Teacher Supplies, Back t…

WRalwaysLX 2pack Decorative Lantern with flameless LED Candle Light, ON/…
Conclusion

Bringing fairy tales to life in your child’s room doesn’t have to be a daunting task. These 13 DIY projects are not only easy and fun but also foster creativity and togetherness.
From magical gardens to whimsical decor, each project creates lasting memories while transforming their space into a breathtaking wonderland. So gather your supplies, invite your little ones to lend a hand, and let the magic begin!
Note: We aim to provide accurate product links, but some may occasionally expire or become unavailable. If this happens, please search directly on Amazon for the product or a suitable alternative.
This post contains Amazon affiliate links, meaning I may earn a small commission if you purchase through my links, at no extra cost to you.
Frequently Asked Questions
What Are Some Simple DIY Fairy Tale Decor Projects for Kids?
If you’re looking for fun and engaging ways to decorate your child’s room, there are plenty of simple DIY fairy tale decor projects to explore! From creating magical wall art to designing whimsical fairy lights, you can involve your kids in the crafting process. Projects like making a DIY castle out of cardboard or painting fairy tale characters on canvas can spark creativity and bring their favorite stories to life.
These easy crafts not only enhance the room’s aesthetic but also provide a wonderful bonding experience!
How Can I Make DIY Fairy Tale Decor Projects Kid-Friendly?
Making DIY fairy tale decor projects kid-friendly is all about choosing the right materials and techniques. Opt for non-toxic paints, safe scissors, and easy-to-use crafting supplies. Break down each project into simple steps, and consider using templates or guides to make it easier for kids.
Encourage creativity by allowing them to personalize their designs, ensuring the crafting experience is fun and enjoyable for everyone!
What Materials Do I Need for Easy Fairy Tale Decor Crafts?
When diving into easy DIY fairy tale decor projects, you’ll need some basic materials! Common supplies include colored paper, paints, brushes, glue, scissors, and fairy lights. You might also want craft items like glitter, stickers, or fabric for added flair.
Look around your home for recyclable materials like cardboard boxes or old sheets, which can be transformed into whimsical decor pieces with a bit of creativity!
Are There Tutorials Available for DIY Fairy Tale Decor Projects?
Absolutely! There are numerous online tutorials available for DIY fairy tale decor projects. Many websites and YouTube channels offer step-by-step guides that cater to various skill levels. These tutorials often include materials lists, instructions, and helpful tips to make your crafting experience easier.
Whether you’re a beginner or a seasoned crafter, you’ll find plenty of resources to inspire your next creative adventure!
How Can DIY Fairy Tale Decor Projects Enhance My Child’s Imagination?
Engaging in DIY fairy tale decor projects can significantly boost your child’s imagination! As they create their own decor, they immerse themselves in the stories and characters they love, fostering creativity and storytelling skills. They can envision their own fairy tale world, which encourages imaginative play and problem-solving.
These projects not only beautify their space but also serve as a canvas for their thoughts and dreams, making their environment truly magical!
Related Topics
DIY fairy tale decor
easy crafts
kid-friendly projects
home decor
creative tutorials
fantasy themes
parent-child activities
simple crafts
whimsical decor
beginner friendly
seasonal crafts
magical designs


